Showing posts with label recycling. Show all posts

Table Made of Trash


This is a blog post on my recently completed science fair project. I was given 400 minutes (6 hours and 40 minutes) in all to finish the project. This time was spaced out over two weeks in 50 minute increments. The criteria was as follows: complete it in the time limit, spend no more than $25, and make something environmentally friendly and sustainable. This is an account of how I accomplished this, what I made, and what I learned along the way.

After some consideration, I decided to make a small coffee table out of other people's trash. I did not do this for the table itself, (Yes, making the table was necessary for me to accomplish what I hoped to do, but lots of other up-cycled things would do as well.) my real goal in making the table was to showcase how easy reusing things could be. In a very short amount of time I was able to make a working, decent looking, and (mostly) durable, coffee table. It actually wasn't designed as a coffee table, but just as a little table that could fit by your couch. Calling it a coffee table is just easier than saying, “ a little table that could fit by your couch”
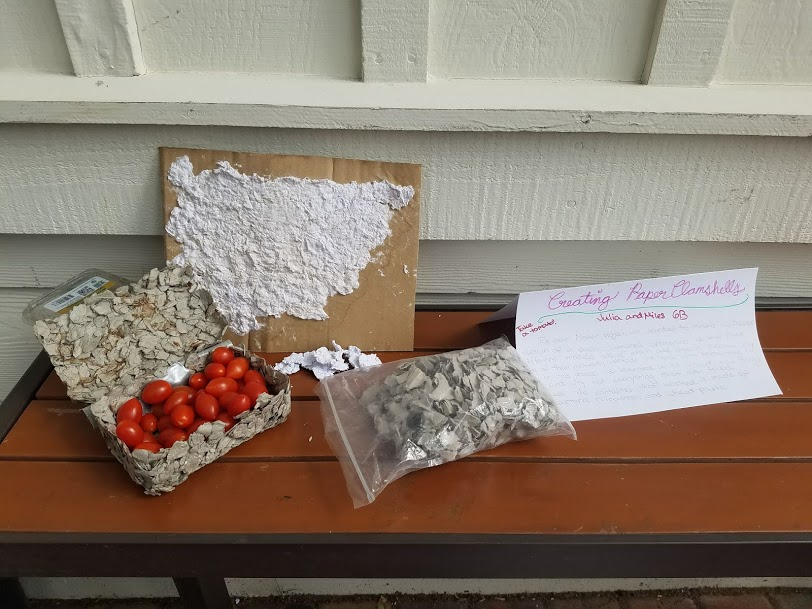
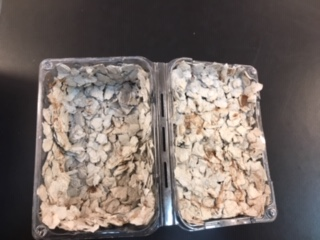


My project


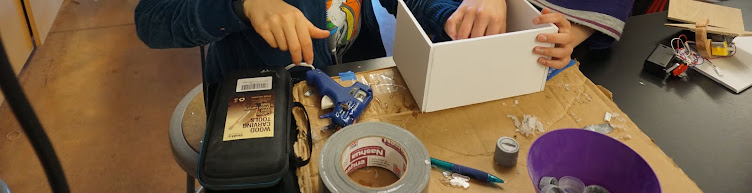
One of the most difficult parts of making the table was gluing the top onto the base. The tops of the large tins that serve as the main structure of the base are not flat, it is hard to get the glue to be strong with so little contact. Since there were no other adhesives I wanted to use on hand, I had to find a way to solve the glue problem. After some thought, I cut a piece of cardboard to size, and glued it onto the top on the tin. I then glued the top to both the cardboard and the edge of the tin. That worked pretty well.

If you were to try a project similar to this, I recommend that make a rough plan of your design after you get your materials but before you start building. That will likely make your process smoother and easier.

Through the process, I learned a lot about reuse, glue, and a bit about engineering. I think with my experience making this, I could do better if I tried a similar project in the future. If I had more time to work on this, my next step would be talking to others and getting them on board with reuse and up-cycling. In a way, I’m doing that with this blog.

Depending on how much you are able to find in your trash, and if you have glue on hand, this project might be free! That is one of the things that makes it so cool.

Sustainable Paper Making


Our goal for this project was to create paper in a sustainable way, and because we are not allowed to cut down trees, we decided to go dig inside a recycling bin, where we found lots of paper. It was Jonah's idea that we should make paper out of paper that cannot be used for anything anymore else. At first, we were thinking about working with Meyer, but then we realized it was impossible to build a zip line going off of a deck (which is what we where going to do.) Instead, we decided to make recycled paper and Meyer branched off of our group because he wanted to do something else. We searched the web for how to make recycled paper and we found this nifty video that showed us how to make recycled paper.

We started out by doing research and later moved on to make a sketch. Which later turned into a model, a prototype. Then we made a larger one which worked and functioned a lot better. We had a problem when we couldn’t find any mesh, but luckily Mr. Cohen found some mesh that we could use.

Throughout this process, we learned various things: we learned how to make colored paper (that was really just because we discovered some colored paper that was in the recycling) and most of all, we had fun! The process of making paper is actually quite simple: first, you have to find some paper preferably in the recycling so you are saving trees, not using more of them, then rip it up, and put it in a blender. Next, you fill up the blender with water and blend it for 30 seconds, then you take it out and put it down on your custom-made sifter (the paper pulp goes onto the mesh) the mesh lets all of the water out and keeps the blended paper in (which is what all of our paper is made out of.) After that, we put the paper on to newspaper to iron it, when we ironed the paper it became thinner, plus it was drying faster. But since we wanted it to dry evenly, and we didn’t want to handle an iron all day. We set a heat lamp, and we let it sit overnight with the heat lamp over it, and the next day it was dry.

If we had more time, we would try to figure out a way to make paper in a more sustainable way, a way that we could make more paper and even step farther would be a machine that would make the paper for us. It would also be cool to find some chemicals that would breakdown the paper, making it possible to make it thinner.


This is one of the links that we used to help us make the paper: https://www.youtube.com/watch?v=RR_218EtLJU

Food Storage Done Another Way: Replicating Plastic Clamshells Using Recycled Paper By Miles Reichmann and Julia Fromson-Mayhew 6B-13


While searching for ideas for a Maker project, we started to think about the food industry, specifically what we saw in grocery stores. We noticed how many things are kept in plastic clamshell containers, even things that don’t need to be, like cucumbers. We asked our parents about why they thought things were packaged this way and they said they thought it was because of how easy they are: they are stackable and protective. We knew that these containers were plastic, but they didn’t need to be. We wanted to create a new way to package these foods, without losing the convenience of the clamshell.  We thought about alternatives to plastic, and paper immediately came to mind. We decided to replicate the clamshell containers we saw in the stores, but with recycled paper.
Our Maker Faire Booth
The first step in our design process was figuring out our problem, which was how much plastic is used in the food industry. We then had to identify our criteria and constraints.  Our project had to be under $25, so we decided to use common household items like egg carton containers and paper from the school recycling. Like all the other groups, we had a limited amount of class periods allotted to working on our project.
We composed two different prototypes for this project. The first was made of shredded egg cartons mixed with wheat paste, and the second, paper blended with warm water.  We did not get a chance to revise these very much: the model with the wheat paste dried and worked properly, while the other did not. (See “challenge” below.)
Putting it on the screen
One challenge that we encountered in our process was that the paper wouldn’t dry.  One of our models was made of paper pulp applied to the inside of a plastic clamshell container, brought in from home.  The problem was that the water would drain out of the paper and get stuck in the bottom of the container. Since it was plastic, there was no drainage, and the water was re-absorbed by the paper pulp.  We called this “The Plastic Effect.” There was another group who was also making paper, and theirs was drying on cardboard. When we tried putting scraps of paper into the clamshell as a liner, it only made the problem worse.  Our solution to this problem was to use different materials. Instead of using water in the paper pulp, we shredded egg cartons and mixed it them with wheat paste. This was able to dry better because the wheat paste was less liquidy and left behind more of a substance when it dried.
Our project was completely free, because we only used things that were already available to us. We brought clamshells and egg cartons in from home, and raided the school recyclings for the paper scraps. The only thing that might be an issue if you try this at home is the paper screen: we already had one at school. You can easily make one by stretching wire mesh across a picture frame or even just using an old window screen. A few links that helped us were Making Your Own Paper and Egg Carton Paper-Making.
First Prototype
We learned a lot in this process. We learned about different ways to keep paper together and different forms of recycling. We also figured out a few things about what makes plastic effective. For example, in “The Plastic Effect,” the plastic is meant to be trapping liquid, which is what makes it effective for things like milk cartons and water bottles. By figuring this out, we were able to find ways to make paper more effective, even if we weren’t able to execute them in the time given. If we had more time, we would have liked to try to mass-produce our model and make it more widely available to stores. We also would have liked to try to create models of some of the things that would have made it more effective.

Rose and Lenka's Maker Fair Project - Recycling: Taught by Gummies


For our project, we made gummies shaped like recycling symbols. We realized people don't know a lot about how trash gets sorted, especially the kids in the lower school. So, we tried to think up a way to reach the little kids. We thought about what would've gotten us interested when we were that young; food! But our food couldn't just be regular old food, we needed to make it relating to our trash sorting problem. We were going to make them shaped like recycling symbols using a molding putty we found on amazon. We quickly realized that we needed something to push in to the molding putty, so we made our own TinkerCAD design. At first we thought about making them out of chocolate, but chocolate was too expensive. We then did research about making hard candies, but for that we would need around 10 cups of corn syrup, so that was not going to happen. Then we came across a recipe gummy bears using jello, it was cheap and easy to make, it was perfect. The estimated cost for our project was around $45 which was a little under our money constraint. During the science fair if kids wanted a candy they would have to answer a question about trash sorting, for example, a question might be, "Where would you put this empty soda can: In the landfill, recycling, or compost?"

One challenge we had was with our TinkerCAD design; we needed to press it into the molding putty. We had tested our 3D printed design two times, finally working the second time, and then we realized we couldn’t print it because Ms. Mytko, Ms. Hill, and Mx. Mason were all at the San Mateo Maker Faire with the seventh graders. The big printer was also at the Maker Faire. So, we used a computer from the FAD to email Rose’s uncle to ask if he could print it for us since he has a 3D printer at his house. He printed our eleven hour print and delivered it to us in time for class on Monday!

We learned a lot in the process of making the gummies. For example,
to make candy you have to be really specific with your recipe and know exactly how much of each ingredient you need, because if you mess one thing up your whole batch could be ruined. You also have to give yourself realistic time checks, because most candies take a long time to set and you will need time to get your ingredients together and check your recipe. If we had had more time, I think we would’ve tried to make some of our candies out of chocolate and candies instead of just doing gummies out of Jello. Our advice to others attempting something similar to this would be to plan out the whole project ahead of time, find a doable recipe, and make sure you have enough time to finish your project.