Showing posts with label Motors. Show all posts

Talking Teddy Bear

Our goal was to create something that was both creepy and cool at the same time. We accomplished that by taking an old talking Teddy Ruxpin (a vintage talking teddy bear that used to be worth a lot), and gutted it, and put more modern motors in its head to move the eyes, nose, and mouth. If we had more time, we would have installed a raspberry pi with a special version of Alexa, along with the code to sync the movements of the mouth with the speech of Alexa. If we were to turn our project into something really creepy, we could have added a camera to the bear and added motion detection and facial recognition. We knew this was all possible and we had the materials and the know-how to build it, we simply just didn’t have the time.

Our inspiration to build this teddy bear was TinkerNut, a YouTuber who demonstrated that it was possible to give a teddy bear Alexa. We looked up to them for how to work on our project. They showed us lots of how we should build our teddy bear.

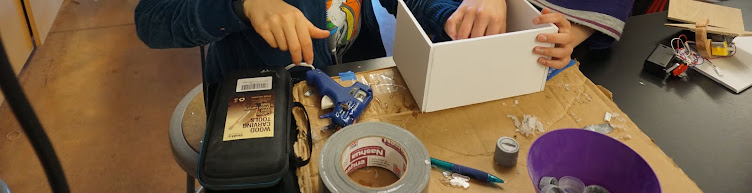
A challenge we encountered was mostly time restraint and getting the new motors to fit into our teddy bear. On the topic of time restraint, we had very big ideas and dreams of what our project would become, but we did not consider how little time we had to do it. We got over having trouble with the motors by starting with a new motor and ripping up the case less so it still fit in the socket.

We learned how to rip apart a Teddy Ruxpin and make it look extremely disturbing. We also learned how to put motors together and we learned a lot about how motors and circuits work.

We would advise to not procrastinate and not to plan to do something huge that will probably take more than your whole life span to finish (if you even live an average lifetime; we’ll probably die because of climate change soon enough. Or maniacal talking teddy bears. Lol… we're all gonna die...).

Our total cost: $120


Links:
https://www.youtube.com/watch?v=cwHS7F6L13E
https://www.youtube.com/watch?v=34cfkA9HlXk&t=184s
https://www.youtube.com/watch?v=AZX9rU9Sbhk

Automatic Chicken Feeder

Our project, the automatic chicken feeder, can be used for easier and more efficient chicken feeding. It will make the twice a day feeding as simple as pressing a button. We wanted to do this project because one of us is taking home four of the chickens we raised at school. He wanted to make his chicken related chores easier and less time consuming.

There were some challenges that we faced. The challenge that we faced the most was that the motor was not strong enough, or the containers movement was not stable. The motor we used was not strong enough to lift all the food, so we had to put it at a slant to distribute the weight across the feeder. The container was originally designed to push up the food and then it would fall out a hole, but when the container was pushed up, the container would fall over. We scrapped that idea and went with a wheel that would push out the food, and it was more feasible than the last idea.In the process of doing this project, we learned that dc motors are not the strongest and we needed to not put all the weight on the motor, or else it would not work.

Our next steps would be to build the feeder with plywood and nails, instead of cardboard, duct tape, and hot glue, and replace the DC motor with a stronger one. If someone else is going to build this, I would recommend them to use a more powerful motor than a DC motor.The cost was estimated to be about $16.50. This includes plywood for structure, the DC motor for the automatic part, a couple thin steel rods that can be used as axles. On the Paper Mech website, we found a simple machine to push up and down a platform, but that idea was eventually scrapped due to the platform not being stable. http://www.papermech.net/up-down-crank/

The Mighty Hug Machine


    For our project, we designed a hug machine. We designed the machine so that if someone put an object in front of it, the machine would squeeze or hug it in a matter of a couple of seconds. We were not really inspired by any other projects, but we were inspired by lonely people who did not have hugs. Hugs can help calm people down, and everybody needs a warm embrace after a hard day. We just came up with the idea, along with a couple of other ideas, and after changing our project three times, decided to go with this one.
    We had some problems with the design of the machine. The most prominent challenge we had was figuring out how to get the forearms of the machine to curve inwards in order to squeeze or hug the object or person. We spent a lot of time thinking about this issue until we finally came up with a solution. Our solution was to attach poles to the machine to block the movement of the forearms while the upper arms kept moving away from each other to make the forearms curve inwards into a hugging or squeezing position.
    We used YouTube to research how to animate our hug machine 3D model using Blender. Although it took time and effort, we finally learned to animate using Blender, and to successfully create an animation of what our hug machine would have looked     like.
    Due to the time constraints, we were unable to construct a physical machine. If we had been given more time, we would have done so. We would also have tried to advance the design of the machine so it would also work with smaller objects or people. With our machine the way it is now, any object or person we used would have to be reasonably big.
    We would advise people to focus on the brainstorming, since a good idea is essential to having a good project. While you obviously should not get carried away, do not be afraid to push yourself out of your comfort zone. We would also advise people to get an early start and to do most of the designing at the very beginning.
Our project cost $0 since we did not build it. If we had, it would have probably cost somewhere in the $150-200 range due to the amount of wood necessary to build the body of the machine, large servo motors to move the arms, and padding for the arms to make it more comfortable and less rough.
   
Bibliography
Studios, Thilakanathan, director. Introduction to Basic Animation in Blender. YouTube, YouTube, 25 Aug. 2015, www.youtube.com/watch?v=7ZkdR1L91Ik.