Bicycream
By: Margaux, Ermie and Theo
For BPC’s Maker Faire, 2019, our group decided to base our project around making ice cream while biking in place. Our project also incorporated the idea of the motivating people to work by having a sweet end goal in mind; the only way to obtain the reward of your exercising, the ice cream, is to bike and actually churn the ice cream by cycling. We decided to do this project because some people won’t exercise without a reward,or are lazy and need a way to motivate themselves. Now, we have found a solution to this problem: Ice cream. We discovered a way for someone to make ice cream while biking, and the only way to obtain this cool, refreshing treat is to go on a bike ride in your house while binging on your favorite Netflix show or around the park while enjoying the fresh air.
First, we envisioned a frame around the back wheel with a cylindrical box attached in the middle. The power would be generated by the back wheel. Since the container was touching the wheel while it spun, the container, in contact with the wheel, would spin as well. We didn’t prototype this idea, which was a mistake that ultimately made it harder to complete our finished project, but we did brainstorm for quite some time and figured out different ways to make it work.
First, we envisioned a frame around the back wheel with a cylindrical box attached in the middle. The power would be generated by the back wheel. Since the container was touching the wheel while it spun, the container, in contact with the wheel, would spin as well. We didn’t prototype this idea, which was a mistake that ultimately made it harder to complete our finished project, but we did brainstorm for quite some time and figured out different ways to make it work.
To assemble all the pieces, we went to Ace Hardware to get a PVC cross-connector. We put the bike head through the cross and attached two pieces of PVC on either side of the seat. Then, we put a T-connector on both ends of the PVC so we could add two new longer pieces of PVC that extended all the way and rested near the back wheel. Finally, we attached the container to these pipes by drilling holes into either end sticking a wooden dowel through the lid and bottom. The dowel continued into the PVC pipes that were already drilled with holes. With the box in between the pipes, it rested on the wheel and spun with it.
This is what it looks like:

We were inspired to do this project because we had immediately known that we wanted to do something centered around ice cream, but were unsure of what. One of our group members had previously made ice cream in plastic bags and found it to be successful and easier than using an ice cream machine. We needed a simple and portable way to make it at school, so we thought of homemade ice cream in plastic bags. After presenting our ideas to the teacher, we decided that, even though it was a good project, we needed more. With that, we turned it into bicycle ice cream! The objective our our new-formed plan was to motivate people to exercise by giving them a reward to work for. They have to earn it; if they don’t pedal, there is no ice cream. We were stuck and couldn’t find anything to do for Maker Faire but our brilliant, smart, ingenious, creative science teacher, Ms. Mytko suggested we do something very "makery," like a thing that was powered by a bike. We also wanted to do something with ice cream so we combined the two ideas and created our project.
This is what it looks like:
We were inspired to do this project because we had immediately known that we wanted to do something centered around ice cream, but were unsure of what. One of our group members had previously made ice cream in plastic bags and found it to be successful and easier than using an ice cream machine. We needed a simple and portable way to make it at school, so we thought of homemade ice cream in plastic bags. After presenting our ideas to the teacher, we decided that, even though it was a good project, we needed more. With that, we turned it into bicycle ice cream! The objective our our new-formed plan was to motivate people to exercise by giving them a reward to work for. They have to earn it; if they don’t pedal, there is no ice cream. We were stuck and couldn’t find anything to do for Maker Faire but our brilliant, smart, ingenious, creative science teacher, Ms. Mytko suggested we do something very "makery," like a thing that was powered by a bike. We also wanted to do something with ice cream so we combined the two ideas and created our project.
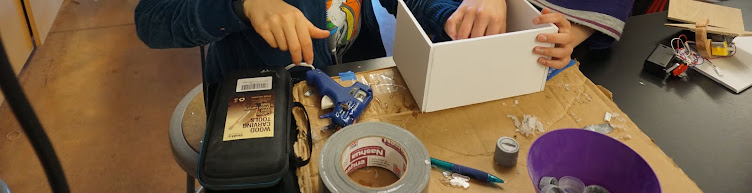
A challenge that we faced was getting the PVC to stay in place. As you can see in the photo above, a member of our group is holding the PVC pipes so that they would stay in place, but when no one was holding them it would slide off the wheel and bump around, therefore causing it to not turn as smoothly when we were pedaling. To solve this problem a member in another group suggested that we use wire and attach it to the bike itself, and after we tried this, it started to work a lot better. As a result, the ice cream did not slide around as much, and overall came out a better consistency. At first, I was reluctant because I wanted to base the project off of the bike exclusively. Eventually, we did it with the help of the other group members. It stayed in place pretty well even though we had to use the borrowed item to do so.
We learned many things on the way to creating our final, finished project. Among those many, the ones that stand out the most are adaptability, making things up on the fly, and that even if you mess up, there is always a way to fix it or make it better. We learned adaptability because our project started out as one simple thing that gradually changed, a lot at first, and then gradually over the course of our project. We learned that making up thing whilst in the middle of doing something, or figuring out that something doesn’t work, came in handy when we couldn’t get the container to stay put on top of the wheel. In the very beginning of our process, when we were drilling holes into the PVC pipes, we would keep either making them too big or too small. Whenever that happened, we would just start over, either on a new pipe or on the opposite end. These are skills that other people attempting to do similar projects would be better off learning earlier on.
If we had more time to complete the project, since we had a pretty good basic start to it, I think we would have just finessed it more, made it run more smoothly, and made larger quantities of ice cream to share with everybody. Our bike-powered ice cream machine worked, but it was only the base platform of what we could accomplish.
The estimated cost we have of our project is very low. Most of the materials we used we found in and around our school, or people had at home already and were fine with bringing them in for use. The only things people in our group purchased was a four-way PVC pipe connector, purchased at Ace Hardware for around $5, and a half gallon of half n’ half, purchased also for $5. Our total project cost was $10. The only outside resource we really used to base our ideas off of, a video as well as a website, was a great example of someone using bicycle ice cream for theirs, as well as other people’s benefits. They made ice cream on a hot, sunny summer day, went for a nice relaxing bike ride, and shared some homemade ice cream with friends and strangers. It was also just a great project in general, and surely inspire other makers to do the same and more.
https://www.youtube.com/watch?v=XbKHoCDwIOg
https://www.youtube.com/watch?v=XbKHoCDwIOg


