Automatic Chicken Feeder

Our project, the automatic chicken feeder, can be used for easier and more efficient chicken feeding. It will make the twice a day feeding as simple as pressing a button. We wanted to do this project because one of us is taking home four of the chickens we raised at school. He wanted to make his chicken related chores easier and less time consuming.

There were some challenges that we faced. The challenge that we faced the most was that the motor was not strong enough, or the containers movement was not stable. The motor we used was not strong enough to lift all the food, so we had to put it at a slant to distribute the weight across the feeder. The container was originally designed to push up the food and then it would fall out a hole, but when the container was pushed up, the container would fall over. We scrapped that idea and went with a wheel that would push out the food, and it was more feasible than the last idea.In the process of doing this project, we learned that dc motors are not the strongest and we needed to not put all the weight on the motor, or else it would not work.

Our next steps would be to build the feeder with plywood and nails, instead of cardboard, duct tape, and hot glue, and replace the DC motor with a stronger one. If someone else is going to build this, I would recommend them to use a more powerful motor than a DC motor.The cost was estimated to be about $16.50. This includes plywood for structure, the DC motor for the automatic part, a couple thin steel rods that can be used as axles. On the Paper Mech website, we found a simple machine to push up and down a platform, but that idea was eventually scrapped due to the platform not being stable. http://www.papermech.net/up-down-crank/

Bicycle Ice Cream


Bicycream 
By: Margaux, Ermie and Theo

           For BPC’s Maker Faire, 2019, our group decided to base our project around making ice cream while biking in place. Our project also incorporated the idea of the motivating people to work by having a sweet end goal in mind; the only way to obtain the reward of your exercising, the ice cream, is to bike and actually churn the ice cream by cycling. We decided to do this project because some people won’t exercise without a reward,or are lazy and need a way to motivate themselves. Now, we have found a solution to this problem: Ice cream. We discovered a way for someone to make ice cream while biking, and the only way to obtain this cool, refreshing treat is to go on a bike ride in your house while binging on your favorite Netflix show or around the park while enjoying the fresh air. 
First, we envisioned a frame around the back wheel with a cylindrical box attached in the middle. The power would be generated by the back wheel. Since the container was touching the wheel while it spun, the container, in contact with the wheel, would spin as well. We didn’t prototype this idea, which was a mistake that ultimately made it harder to complete our finished project, but we did brainstorm for quite some time and figured out different ways to make it work.
           To assemble all the pieces, we went to Ace Hardware to get a PVC cross-connector. We put the bike head through the cross and attached two pieces of PVC on either side of the seat. Then, we put a T-connector on both ends of the PVC so we could add two new longer pieces of PVC that  extended all the way and rested near the back wheel. Finally, we attached the container to these pipes by drilling holes into either end sticking a wooden dowel through the lid and bottom. The dowel continued into the PVC pipes that were already drilled with holes. With the box in between the pipes, it rested on the wheel and spun with it. 
This is what it looks like:

We were inspired to do this project because we had immediately known that we wanted to do something centered around ice cream, but were unsure of what. One of our group members had previously made ice cream in plastic bags and found it to be successful and easier than using an ice cream machine. We needed a simple and portable way to make it at school,  so we thought of homemade ice cream in plastic bags. After presenting our ideas to the teacher, we decided that, even though it was a good project, we needed more. With that, we turned it into bicycle ice cream! The objective our our new-formed plan was to motivate people to exercise by giving them a reward to work for. They have to earn it; if they don’t pedal, there is no ice cream. We were stuck and couldn’t find anything to do for Maker Faire but our brilliant, smart, ingenious, creative science teacher, Ms. Mytko suggested we do something very "makery," like a thing that was powered by a bike. We also wanted to do something with ice cream so we combined the two ideas and created our project.
           A challenge that we faced was getting the PVC to stay in place. As you can see in the photo above,  a member of our group is holding the PVC pipes so that they would stay in place, but when no one was holding them it would slide off the wheel and bump around, therefore causing it to not turn as smoothly when we were pedaling. To solve this problem a member in another group suggested that we use wire and attach it to the bike itself, and after we tried this, it started to work a lot better. As a result, the ice cream did not slide around as much, and overall came out a better consistency. At first, I was reluctant because I wanted to base the project off of the bike exclusively. Eventually, we did it with the help of the other group members. It stayed in place pretty well even though we had to use the borrowed item to do so.
         We learned many things on the way to creating our final, finished project. Among those many, the ones that stand out the most are adaptability, making things up on the fly, and that even if you mess up, there is always a way to fix it or make it better. We learned adaptability because our project started out as one simple thing that gradually changed, a lot at first, and then gradually over the course of our project. We learned that making up thing whilst in the middle of doing something, or figuring out that something doesn’t work, came in handy when we couldn’t get the container to stay put on top of the wheel. In the very beginning of our process, when we were drilling holes into the PVC pipes, we would keep either making them too big or too small. Whenever that happened, we would just start over, either on a new pipe or on the opposite end. These are skills that other people attempting to do similar projects would be better off learning earlier on.
           If we had more time to complete the project, since we had a pretty good basic start to it, I think we would have just finessed it more, made it run more smoothly, and made larger quantities of ice cream to share with everybody. Our bike-powered ice cream machine worked, but it was only the base platform of what we could accomplish.
         The estimated cost we have of our project is very low. Most of the materials we used we found in and around our school, or people had at home already and were fine with bringing them in for use. The only things people in our group purchased was a four-way PVC pipe connector, purchased at Ace Hardware for around $5, and a half gallon of half n’ half, purchased also for $5. Our total project cost was $10. The only outside resource we really used to base our ideas off of, a video as well as a website, was a great example of someone using bicycle ice cream for theirs, as well as other people’s benefits. They made ice cream on a hot, sunny summer day, went for a nice relaxing bike ride, and shared some homemade ice cream with friends and strangers. It was also just a great project in general, and surely inspire other makers to do the same and more.     
 https://www.youtube.com/watch?v=XbKHoCDwIOg

Soap project

Soap
For our project we made soap. We used old soap and turned it into new soap. We infused essential oils to make the soap smell good. We also added coloring to make the soap look nice and so it could have a neat design. Our objective was to create a soap mold and have the soap set in the mold. We made the mold out of silicon. The silicon mold hardened in 24 hours. After it hardened we made our soap.

Our first thought for maker fair was to make a cake but our project was not approved by our teacher. So we had to think of other ideas. We came up with soap because we thought it would be cool to recreate our own type of soap. Also because it was something we haven’t done before. Our initial goal was to make something we haven’t made before.


One of our challenges was to not have the soap overflow in the microwave. We learned that in order for that not to happen, we had to check on the soap in the middle of the heating process.

The thing we learned throughout this whole project was how to make the soap mold and the soap. Before this project we didn’t even know what silicon was and we still don’t have a clear definition, but we understand how to use it. If we had more time we would have bought more colors for the soap and make more silicon molds. We would also want to add more scents. Finally, we would’ve wanted to make the soaps have more volume so they could be thicker. Making the soap was really fun to do with a partner because you get to interact with your partner and also less stressful because you could rely on each other for certain things. Especially with the time we had it was extra great to have a partner.

We first started by planning on what we were going to do first, than we ask Ms, Mytko how to make a mold so she gave us two ingredients that make silicon so then we made a mold and we also see other molds to make the soap. After we got the soap then we headed it up in the microwave, and we tried to not let it explode. We also used some scents and some pigment to get a marble color. Are project is easy to understand, but sometimes people thought that you could eat it.


We didn’t really want to take things from school so we used materials from home, because we didn’t want to spend a lot of money. We spent at least $30 plus the things that Ms. Mytko provided. We got our idea from youtube source https://www.youtube.com/user/divascancook?safesearch=1


We learned that we had to check on the soap while it was in, because if you do it with explode, we also let learned to communicate with each other so we can have a better experience.

By
Savannah, Dakota

Cigarette Butt Bins!

Trash is EVERYWHERE. In our oceans, animals, roads, forests, and some of our world has even been created on top of trash mountains. Trash is killing our planet. We don’t want to sit back and watch our world crumble and fall. One of the things we hate so much is watching somebody finish a cigarette and then flick the cigarette onto the ground and walk away. We have seen people throw cigarettes out the car window while driving! We see cigarettes everywhere, even when there is a trash can nearby. They are by far the most common type of trash that we see in our area. We can’t stand it. One of our dads also really hated these litterbugs and the cigarettes they were leaving all over the neighborhood. So, he created (cigarette) butt bins. Butt bins are small painted flower pots that are attached to a telephone pole. They also come with laminated signs explaining their purpose. They are there so that smokers have an easy place to put their cigarettes and will stop littering everywhere. But people have been taking some of them down! We don’t know who, or why, but several have disappeared. For our project, we wanted to help solve the problem of the cigarette butts by making more butt bins and distributing them to more areas. We want to see our cities be more beautiful and clean!
We began by buying the flower pots, some pipe clamps, the screws and the washers. These were easy to find, and can be bought at a local hardware store. Supplies for fifteen butt bins only cost about $45. Once we got the flower pots, we painted them with acrylic paints and waited for them to dry. We decided to paint the butt bins with some cheery colors and patterns to make the bins POP and look more inviting. Next we prepared the signs and laminated them. We chose a worthy telephone pole, and used a staple gun to mount the laminated sign. We found a crack in the telephone pole, and screwed the pipe clamp in to the crack. We inserted the painted pot, and voila, we had our first butt bin.
Some small challenges that we had to overcome are the laminator crisis and the printing fiasco. Elena has a laminator but unfortunately the laminator-stuff ran out before we were done laminating all of our signs! We came up with the idea of just using scotch tape to laminate them, which works almost as well. Also, we didn’t have a colored printer so Elena’s dad kindly offered to print them at his work. One of the biggest challenges we’ve faced are some haters who have been completely ignoring, or even removing our butt bins! I’ve seen cigarettes lying right on the ground near the butt bin! We were frustrated and a little sad that we gave people an easy alternative to littering, and they just ignored it.
We put up a butt bin near one of our favorite cafes, Hudson Bay Café. It was a good spot, a lot of people went there so there were a lot of cigarettes. I am so glad that the Hudson Bay Café dumped out the bin when it was empty, we didn’t always have time. Back to the story: one day, the butt bin outside of Hudson was taken down. We couldn’t find a replacement very fast but luckily the amazing people at Hudson Bay Café came to the rescue! They put up their own butt bin, not the same but it still worked the same. We still see it when we go to Hudson for a drink and treat and are eternally grateful that they found a solution! We found it very inspiring that they chose to create their own butt bin instead of just ignoring the fact that ours was taken down.
The maker faire at BPC went really well! We were so happy to see so many people that were supportive of our idea! It was nice to find out that there are so many good people in this world that are working for a better future. All of the cigarette butt bins that we were giving out were taken before the faire was even halfway over. We were very pleased!!! It was really nice to see that so many people were willing to participate in our project! Sadly, we found two abandoned bins in the Q-Lab but we will put them up soon. A big thank you to everyone who took a bin!


2019 Maker Fair Project Wii Remote

Our project was to make a wii remote that would fit in a wristband. The objective of this project was to make it so that when you play a wii game, you don’t have to worry about the wii remote hitting your arm or falling and breaking. Our inspiration for this project was us hanging out and playing on Gabby’s wii and finding it really annoying to have to hold the wii remote constantly so we thought that it would be a good idea to build something smaller that would function the same way that the previous remote would but it would be smaller and easier to manage.
Some of the challenges we had were that we are in different splits and also Ellie is an opera called Carmen with the SF opera so it was very difficult to find time to build/work together on the project. We overcame this challenge by finding time out of school to work on the project and splitting up the work evenly. We also asked some teachers on the days that we were here to make some exceptions for us so that we could work on maker fair during say English or art or something like that.
During the process we learned how a wii remote picks up a signal, how the console and the remote work together to show a dot on the screen where the remote is pointing. If we had more time we would probably find a way to make the board bendable so that it could fit on a sweatband type thing that would just be on your wrist instead of your entire forearm, and it would actually be functional. Advice to others doing this project would be that learn how the wii remote works as fast as you can so that you can start working on an actual prototype that works instead of doing what we did which was spending all of our time learning how the remote works. If we had more time, we would build a version of the wii remote that you don’t have to hold, has a smaller build and you have a smaller holder for the batteries.
An estimated cost for our project would be about $68. The wii remote itself would cost about $20 if you wanted to get a good one (otherwise about $10) and the fabric would cost about $10 so in total that would be about $30 for a good remote and good quality fabric. On top of this a screwdriver and other tools to open the wii remote would come to about $40
Some of the resources we used are https://electronics.howstuffworks.com/wii3.htm, https://www.youtube.com/watch?v=ETAKfSkec6A,https://www.youtube.com/watch?v=lXwKXPgx6mI,https://www.google.com/search?q=wii+remote+inside+and+what+everything+is&rlz=1CAXWWL_enUS850&source=lnms&tbm=isch&sa=X&ved=0ahUKEwiq2vPivq_iAhWFvp4KHQCEBogQ_AUIDigB&biw=1366&bih=665&safe=active&ssui=on#imgrc=GfT_HssteDNU9M:

The Mighty Hug Machine


    For our project, we designed a hug machine. We designed the machine so that if someone put an object in front of it, the machine would squeeze or hug it in a matter of a couple of seconds. We were not really inspired by any other projects, but we were inspired by lonely people who did not have hugs. Hugs can help calm people down, and everybody needs a warm embrace after a hard day. We just came up with the idea, along with a couple of other ideas, and after changing our project three times, decided to go with this one.
    We had some problems with the design of the machine. The most prominent challenge we had was figuring out how to get the forearms of the machine to curve inwards in order to squeeze or hug the object or person. We spent a lot of time thinking about this issue until we finally came up with a solution. Our solution was to attach poles to the machine to block the movement of the forearms while the upper arms kept moving away from each other to make the forearms curve inwards into a hugging or squeezing position.
    We used YouTube to research how to animate our hug machine 3D model using Blender. Although it took time and effort, we finally learned to animate using Blender, and to successfully create an animation of what our hug machine would have looked     like.
    Due to the time constraints, we were unable to construct a physical machine. If we had been given more time, we would have done so. We would also have tried to advance the design of the machine so it would also work with smaller objects or people. With our machine the way it is now, any object or person we used would have to be reasonably big.
    We would advise people to focus on the brainstorming, since a good idea is essential to having a good project. While you obviously should not get carried away, do not be afraid to push yourself out of your comfort zone. We would also advise people to get an early start and to do most of the designing at the very beginning.
Our project cost $0 since we did not build it. If we had, it would have probably cost somewhere in the $150-200 range due to the amount of wood necessary to build the body of the machine, large servo motors to move the arms, and padding for the arms to make it more comfortable and less rough.
   
Bibliography
Studios, Thilakanathan, director. Introduction to Basic Animation in Blender. YouTube, YouTube, 25 Aug. 2015, www.youtube.com/watch?v=7ZkdR1L91Ik.


The Useless Box

We made a Useless Box out of foam board, wood, and a circuit. As the name suggests, it literally does nothing. You flip the switch at the top of the box and a wooden arm will come out of the box to flip it back. Its sole "purpose" is to turn itself off. Our objective was to create a useless object that people enjoy using.


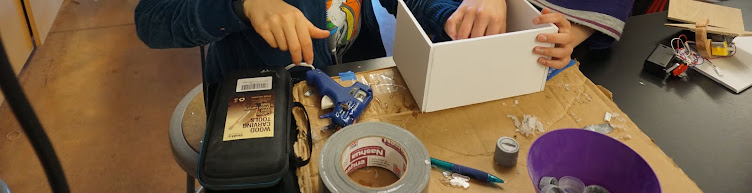
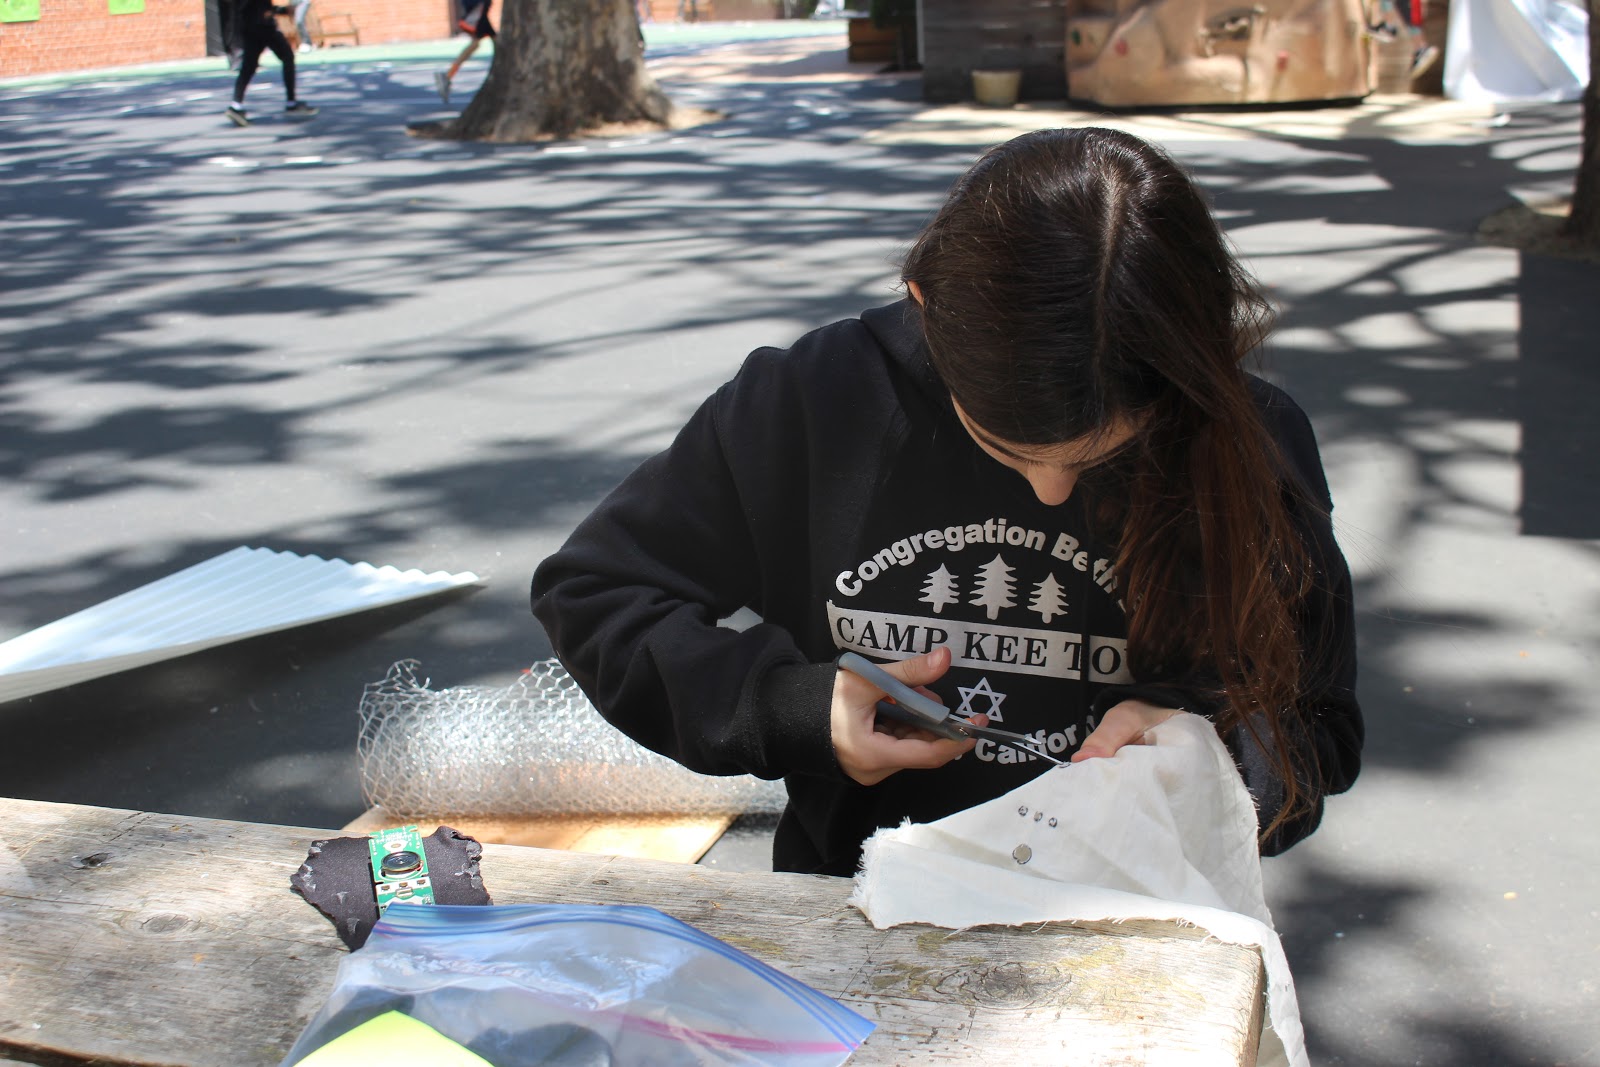
First, we had to gather the materials. It was challenging to find them, and we ended up ordering some of them in bulk on Amazon. We then cut the arm and the faces of the box out of foam poster board using X-Acto knives. We ended up replacing the top of the box and the arm with wooden pieces, because the top needed to withstand the lever being flipped up and down, and the arm needed to be heavy enough to flip the switch. After this, we connected the toggle switch, lever switch, battery pack, and motor to create the circuit. We then hot glued the bottom and all of the sides of the box but one. We assembled the circuit inside the box, then finally glued down the top and remaining side.


After browsing the internet for Maker Faire ideas, we came across a wind-powered machine called the Strandbeest. We were amazed at the Strandbeest, but, though the prospect of creating one was exciting, we decided that it was too complex to complete in the time limit we had. We continued to search and eventually found a kit to make a useless box. We researched the useless box and were immediately intrigued. We thought that creating a machine with no real "purpose" was hilarious. We settled on making a useless box but decided to increase the difficulty of the project by creating it from scratch and rather than using the kit with premade pieces.


During the process of constructing the useless box, we came across many challenges and were forced to tweak our design in order to overcome obstacles. Ensuring that the wooden arm successfully pushed the switch was one of the main issues we had. We had initially cut an arm out of a sheet of foam board. However, after cutting it out, we quickly realized that the foam was too light and weak and wouldn’t be able to push the switch. The foam arm was flimsy and relatively “soft.” Due to this, we decided to make a new arm out of wood. The wooden arm was significantly more durable and rigid than the foam board iteration, and it was able to push the switch. The one downside of using wood was that altering the size of the arm was more difficult. At one point, we had to saw off a bit of the arm in order for it to hit the switch at the right point. While sawing the arm, the wood broke. We had to glue the pieces back together and let the adhesive dry. This set our entire construction process back a day.


In the process of making the box, we learned several things. One thing we learned was how to use a drill. One of our group members sort of knew how to use a drill, but we weren’t sure if the drill was turning the right way or if it was rotating backward. We still don’t know. Another thing we learned was how to cut circles out of using an X-Acto knife, which is a lot harder than it looks. We practiced cutting several circles before cutting out the prototype for the arm. We also learned how to be innovative while assembling things. For instance, we realized our motor was positioned too close to the top of the box for the arm to flip the switch, so we hot glued a diet coke bottle cap in between the lid and the motor.


If we had more time, we would have wanted to fix the box so that the wooden arm would always flip the switch. At the BPC Maker Faire, the box only worked some of the time, and about 40% of the time you had to flip the switch back by hand. We thought we could solve this by using a battery pack with a higher voltage, because ours had only 3 volts, or by using hot glue to secure the wooden arm to the motor. However, when we tried to connect a second battery pack, which was 3 volts as well, nothing would happen when you flipped the switch. As we didn’t have any battery packs with a higher voltage, we disconnected the additional battery pack. If we had more time, we also would have liked to create a similar box where an arm takes your coin from a tray and puts it into the box.


As mentioned above, we learned quite a few things from this process and now have a better idea of how to approach this project. If you were to build a useless box, we would advise that you use a 6-volt battery pack opposed to using a 3-volt battery pack as we did. We found that the 3-volt battery pack supplied just enough power and force for the arm to hit the switch. However, after using the machine a few times, the battery would get drained and you were forced to wait a few minutes before using it again. In addition to this, we would recommend securing the wooden arm to the motor with hot glue or another adhesive. This would ensure that the arm doesn’t wiggle and get out of place, for even a slight change in the position of the arm could determine whether or whether not the arm pushes the switch.


Overall, this project cost around $11. However, do keep in mind that most of these items were bought in bulk or in sets and not singularly. It is difficult to find places which sell these items singularly and purchasing the items in sets was more time efficient. Due to this, the actual cost would be greater than $11 if you were to buy the materials in sets as we did.


Our design was loosely based off instructions we found on the Autodesk Instructables website titled Useless Machine. We didn’t follow the design exactly, as the diagrams it showed were complex and we had trouble understanding them, so Lily’s dad helped us redraw the diagram in a way which made more sense. We didn’t use the same measurements for the box as the creators said to but instead estimated what we thought would work the best. We also decided to make the top out of wood, so that when people flipped the switch back and forth it wouldn’t wear on the foam which we used for the rest of the box. Our box was relatively similar to the one in the instructions, but it wasn’t the same.